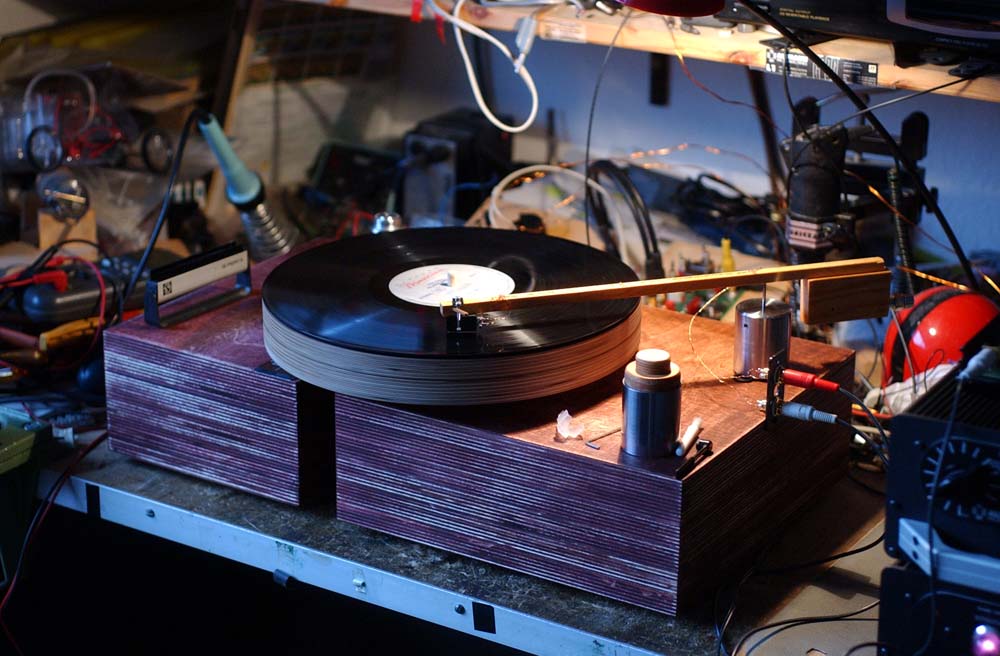
The ALTMANN DIY TURNTABLE
After the success I had with my homebrew tonearm, I decided to build a turntable that is able to fathom the sonic delicacies that the tonearm is able to produce.
Those who visit my sites regularly already know that I am a sucker for natural tone. Therefore the turntable is made to large parts out of wood. Wooden base, wooden motor base, wooden turntable-platter, wooden tonearm. Some ideas make this turntable easy and cheap to build. Depending on your local price for wood, and your ability to find some surplus parts, total cost can be as low as $50,-
This is how it looks:
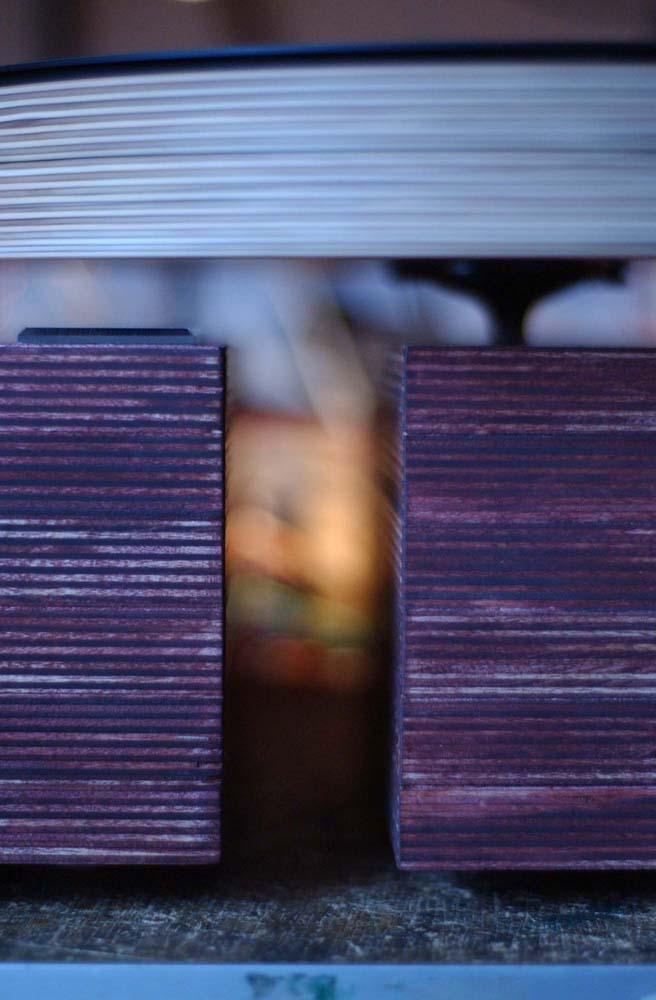
The turntable consists of two separate massive plywood-blocks (glued together from boards). One supports the platter and tonearm (main base), the second supports the motor (motor base). The platter is driven by a simple thread out of mom's sewing box. This way the motor is decoupled from the main base.
Between the main base and the motor base, there's a gap. By moving the motor base away from the main base, you can adjust thread tension.

This gives you the look & feel of a broadminded one-piece turntable - with lots of space for laying accessories like brushes, stylus protector, bottle beer etc. - but the advantage of having a separate decoupled motor base.
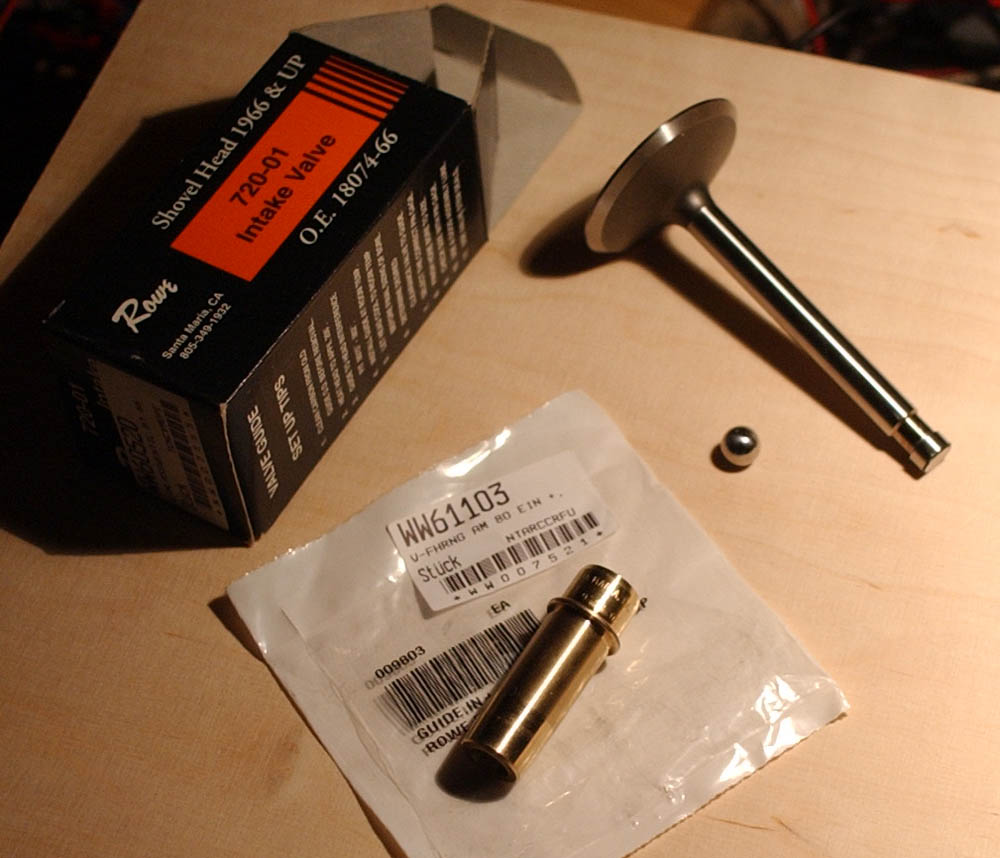
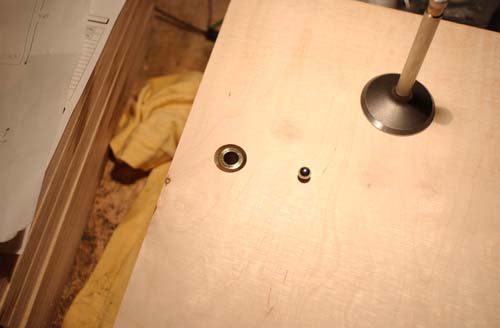
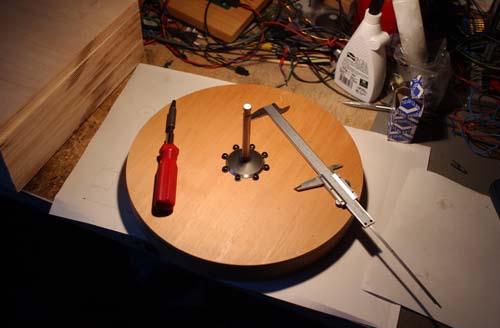
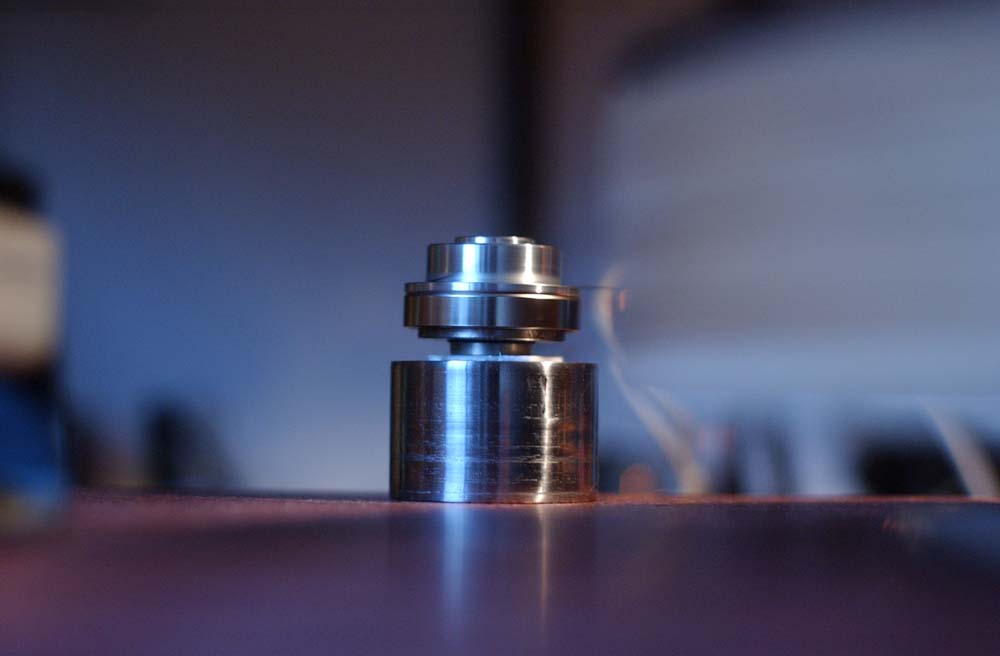
The bearing is made up of a couple of Harley-Davison parts: An intake-valve from the Shovelhead engine (OEM# 18074-66), a matching valve guide, and a 5/16" steel ball (OEM# 8860).
The intake-valve and valve-guide are manufactured by Rowe of Santa Maria, CA (phone 805-349-1932).
The valve-guide chosen is made of AMPCO 45 (a copper, nickel, aluminium, ferric, mangan alloy), which is the highest quality material for valve guides available (keep in mind: What's good for a Shovelhead engine, can't be bad for a turntable)
Those Rowe valves come in three flavours: Standard (shown here), Rowe-Black-Melonite (high performance friction reducing coating) and Rowe-Pro 900 SS (21-4N stainless steel one-piece CNC machined, also black-melonite coated). If you wish to use a titanium valve, you may contact Manley Performance.
You get all the parts you need for this high-performance platter bearing for reasonable cost at your "Local-Harley-Shoppe". If you live in Europe, you may order the parts from W&W (where I got them from).
Okay, I got so many inquiries, here are the W&W part-numbers. You can place your order by phone: +49-(0)931-25061-15.
A half-price-alternative is using the intake-valve & guide from a Royal Enfield Bullet 500 motorcycle (made in India). The differences are: slightly smaller shaft & head.
You can order Royal Enfield Parts at the general importer ZMT, Germany, phone +49-(0)2252-94280.
Note: This type of platter bearing is designed to be lubricated with HD-50 grade engine oil !
First, glue together the wooden bases. The main base is 30x30 cm. The motor base is 20x30 cm. Both bases should have the same height, at least 10 cm is required for correctly installing the bearing. Check out the drawing.
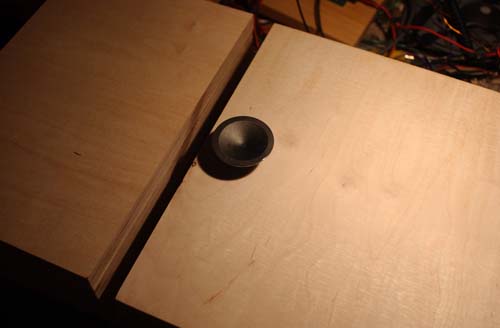
Next, you have to drill the hole for the bearing. If you use the Shovelhead valve-guide with .004 oversize, a 16mm hole will give a snug fit. You need to use a good drilling machine for supporting the massive main-base. Use a 16mm steel drill (not a wood-drill) as you need a centered bottom for the steel-ball, which supports the bearing.
Should look like this:
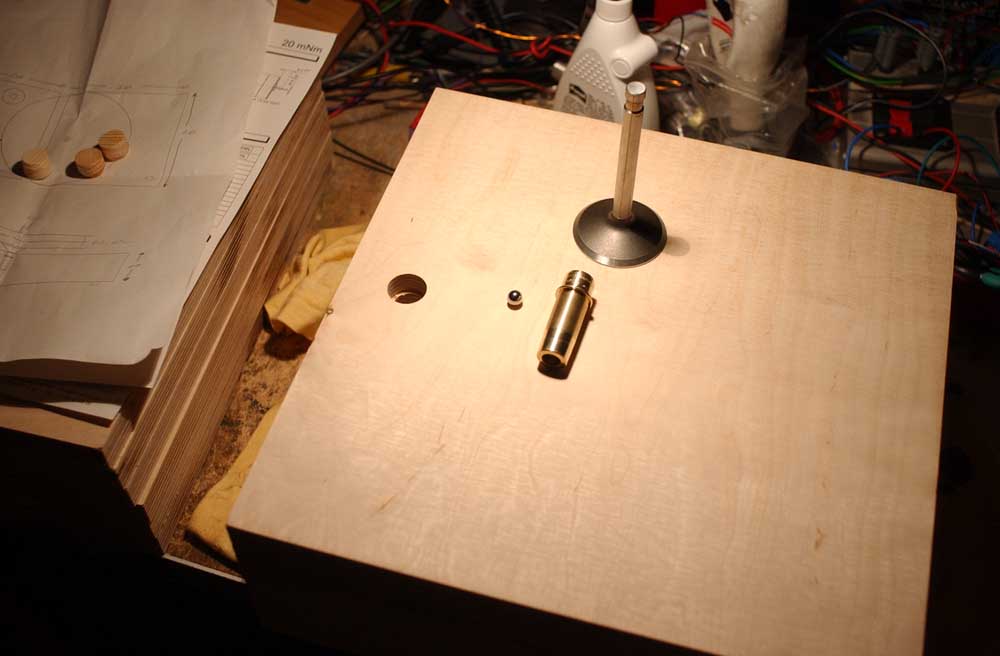
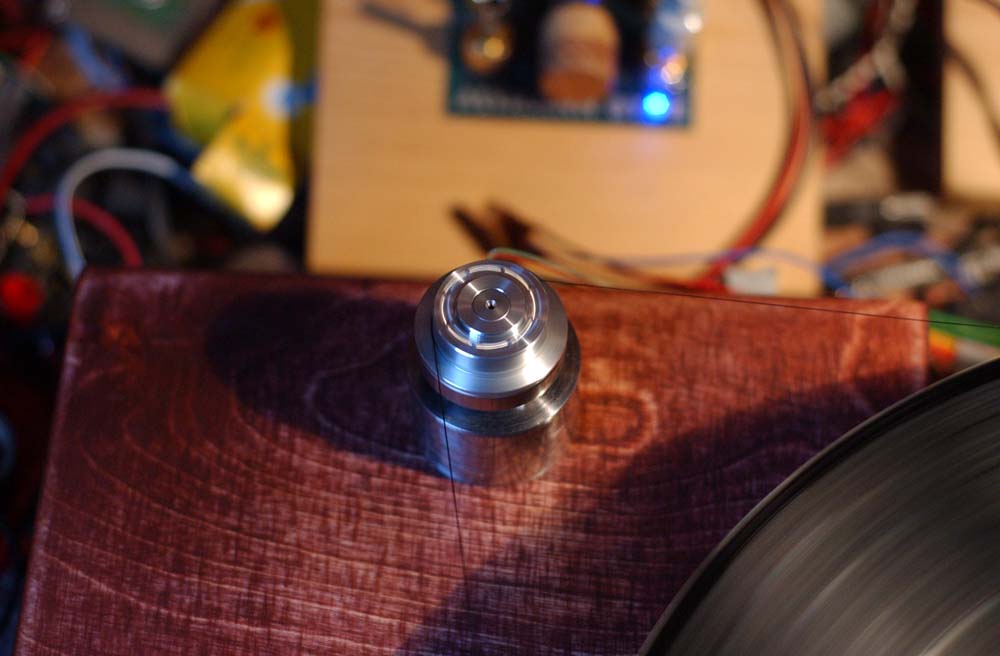
Clean drill hole !!! Glue in the valve-guide (with Ponal), drop the steel-ball into the hole, insert valve.
|
|
|
of this turntable is ... er ... we don't really have that. But we have massive wood bases. Each base rests on 3 spruce feet (see 3 pics above on the left).
With the main base (platter base) foot #1 is below the bearing, foot #2 is below the tonearm pivot and foot #3 is below the tonearm rest weight (see first pic or drawing).
With the motor base, foot #1 is below the motor and feet #2 and #3 are at the front.
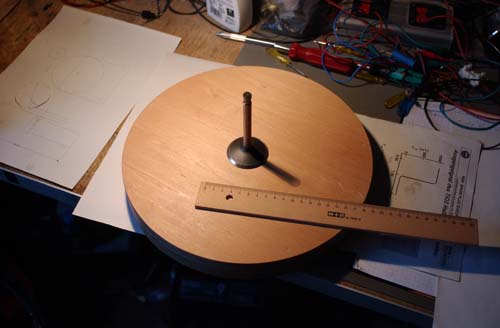
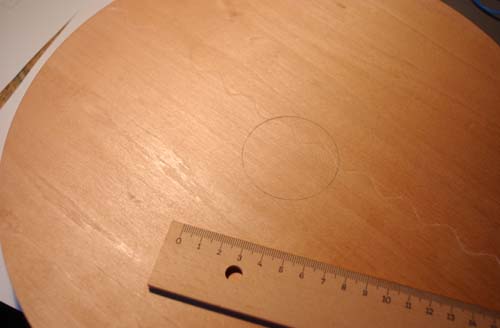
is also made from plywood. It is 30cm in diameter and about 4 cm high. Unless you prove otherwise, I would say, you cannot do this yourself, you have to go to a carpenter who has a CNC- machine. The platter must be ROUND in all aspects. If you are not able to source a woodworker to make you the round platter, you may email my friend Andreas Weuste. Andreas is a CNC specialist and can make a platter for you at reasonable cost.
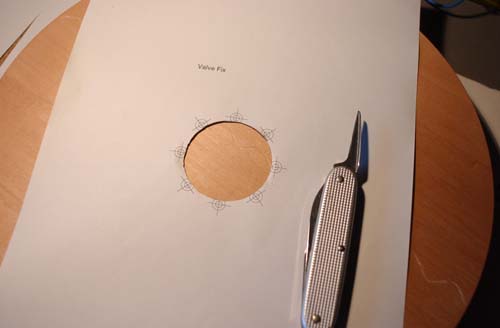
The valve is tightly clamped to the center of the platter using 8 screws. This template will help you. This is a kind of meditation, but you really have to find the CENTER of the platter.
|
|
|
|
|
|
Before you want to mate the platter with the main base, you may want to give both a special treatment, using natural resin from your private lacquer kitchen.
Don't forget the HD-50 grade oil before you let down the platter into the base.
Now you will spend at least half an hour turning the platter, and being completely amazed how good that bearing runs ...
is an important part of this turntable and has to fullfil three basic requirements:
A 4th criterion would be: "availability" and a 5th one: "within the financial scope of this project".
Okay.
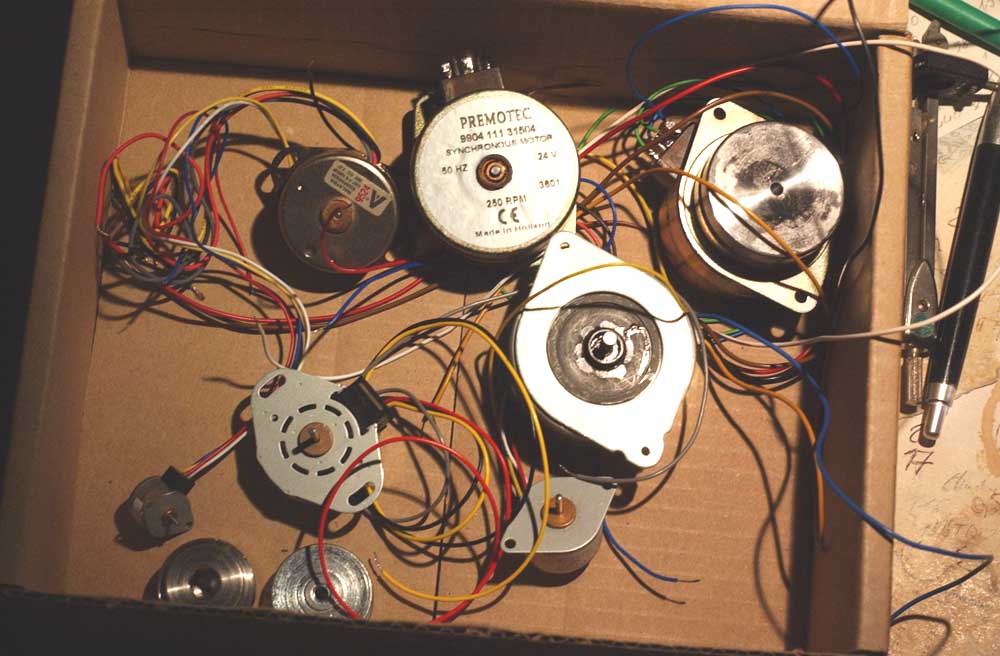
There's DC-motors and AC-sychronous motors:
DC motors require some amount of electronics in order to give constant speed and can have some brush-noise (brushless DC-motors are not really DC-motors ;-)
The Scheu motor already has integrated electronics for motor control.
AC-synchronous motors are rare motors, but often used in turntables. They derive their speed from the AC supply frequency.
One more or less often used synchronous turntable motor is this or that Premotec model. Unfortunately those motors are not really cheap.
So what ...
An interesting idea that came to me, is that a rare synchronous motor (like the Premotec) is nothin-but the same (in principle and end result) as a cheapo two-phase stepper motor with a step angle of 7.5 deg. You can get that for a couple of bucks at AllCorp (click on motors -> stepper motos) or Pollin.
7.5 deg. step angle means that the motor will turn 250 rpm on 50Hz or 300 rpm on 60Hz (just like the Premotec).
They look like this:
Be sure to get a round 7.5 deg. stepper motor, not a square one (too much torque), not a 1.8 deg (too slow). Here's a cool article on how stepper motors work.
How do we accomplish a steady motor speed and a smooth rotation? Of course we do not control the stepper motor with digital steps, as this would lead to a rather rough ride. We treat the stepper as if it was a synchronous motor (which it is), so we feed it with sinewaves. A bipolar stepper motor has two coils (just like a AC synchronous motor).
We need a sine-wave for coil #1 and a 90 deg offset sine wave for coil #2 (as I said, just like AC-synchronous).
This is often done with a mains transformer plus a capacitor for delaying the sine for coil #2. This is not really accurate and also not adjustable.
We want something better. So what do we do ?
We just generate a 50 Hz (or 60Hz) sine wave on the computer using a music program (like cool edit), plus a second sine wave with 90 deg. delay.
Looks like this (top channel leads 90 deg. compared to bottom channel) :

Connect the sound output of your computer to a spare stereo-amplifier, in order to play this sine-wave pattern. Connect both coils of the stepper motor to the amplifier's speaker posts, just as you would connect a pair of speakers. Slowly turn up volume... and ... the motor rotates with a steady 250 rpm (300 rpm if you feed 60Hz). With the volume control you can adjust the sine-wave-voltage for least motor-vibration. This is the basic setup for testing and operating a motor.
Since this is a DIY project you never know the exact diameter of the platter and the motor pulley before. You just know after you hold the parts in your hand. No problem. With this setup you can strobe the platter to do exactly 33 1/3 rpm, because you can change the frequency that you feed into your motor. You may end up feeding the motor with 53.6 Hz for an accurate platter speed. Once you have determined the correct frequency, you may burn that signal on a CD and use your CD-player to control the turntable motor with crystal precision (if you play records your CD-player has no work anyway).
Another way of controlling your turntable motor: The Altmann TERA-PLAYER is able to provide 2 independend precision sine waves, which are read from SDHC card.
The world of high-fidelity turntable-sound is yours.
See below: 7.5 stepper powered by Attraction DAC and BYOB amplifier. Notice the strobe mat.

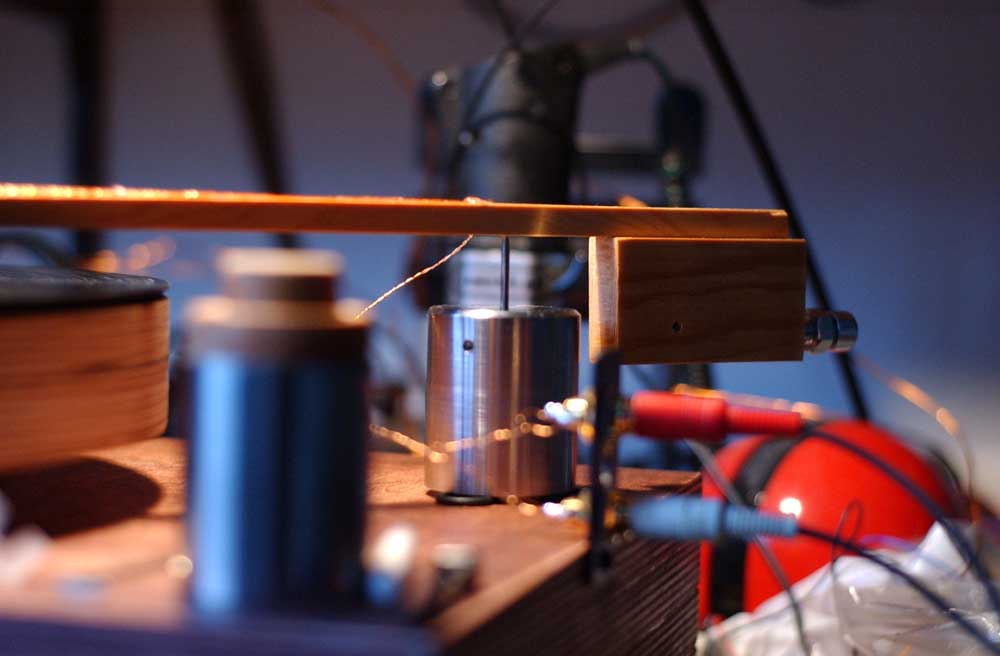
pulls the thread that turns the platter. Two things are important: diameter and mass. The diameter for the above type of motor should be 3..4 cm. The higher the mass (weight) the smoother the pulley will run. Moment of inertia J = 1/2 mass radius square. The higher the moment of inertia the higher the rotational energy W = 1/2 moment of inertia (2 pi frequency) square.
But the heavier the pulley, the more vibration the motor will have (as motor vibration cannot be transferred to the pulley).
Btw. a source for pulleys is model-car wheels ...
Every motor / pulley combination will sound different on the Altmann DIY turntable. You can change the sound from a Garrardesque pace (using a light pulley) to a very stable and relaxed sound (using a heavier pulley).
The rotational energy squares with pulley radius (at a given mass) and with motor frequency. Just set up for your desired sound.

I used some heavier wires this time (0.22 mm).
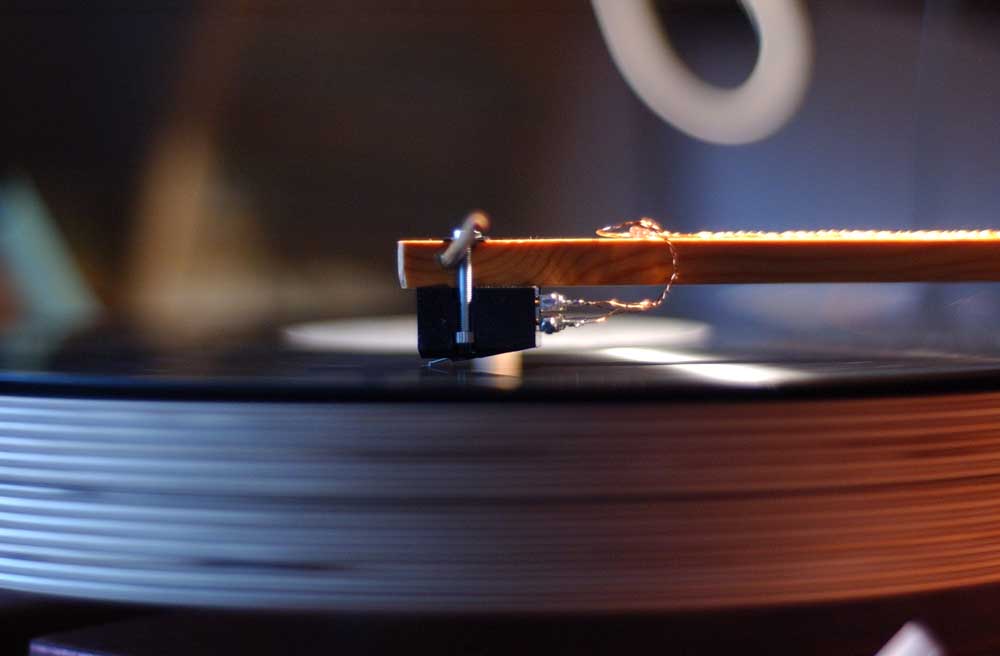
This is a 10" version with a heavy base (holding the knitting needle tightly in place).
Platter and Thread:

Lately I have experimented with spindle-motors taken from old (or broken) computer harddisks.
A spindle drive motor is a high-quality 3-phase synchronous (or stepper) motor which can perform very well.
The downside of using a spindle-motor like this, is that you need to have extra electronics for making 3 phase sinewaves (can't do that with a stereo amp).
Have fun, staring into ... The gap ... :-)
ALTMANN MICRO MACHINES ... Dipl.-Ing. Charles Altmann ... Am Muehlenbusch 57 ...42781 Haan ...Germany
phone +49-2129-54260... fax +49-2129-342555... email